
7-Day Shira Route Trek with 2-Night Hotel Stay Before and After Climb in Tanzania
Elevation (ft/m): 6,000 ft/1,830 m to 9,678 ft/2,950 m
Route & Duration · Tanzania · 7-day pacing plan
Core Experiences · Londorossi Gate to Shira Camp1 · Shira Camp1 to Shira Camp2 · Shira Camp 2 to Lava Tower to Barranco Camp
Service Coverage · Transportation: Round-trip transportation from/to Arusha or Kilimanjaro to the trailhead. · Accommodation: 6 nights of camping on the mounta...
Overview
Elevation (ft/m): 6,000 ft/1,830 m to 9,678 ft/2,950 m
Route Snapshot and Travel Rhythm
A practical route framework around Tanzania, adjustable to your timeline and budget.
Map is loading
If your network is slow, the route map may appear a bit later. You can review the daily route summary below first.
Open map in new tabDay 1
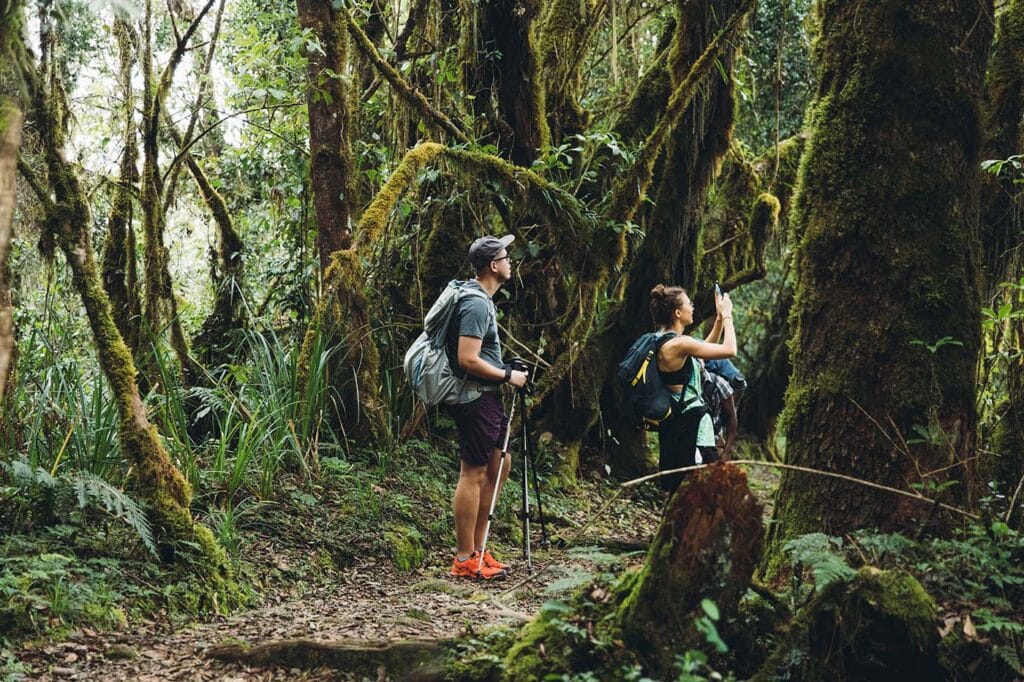
Londorossi Gate to Shira Camp1
Londorossi Gate → Shira Camp1 Elevation (ft/m): 6
Elevation (ft/m): 6,000 ft/1,830 m to 9,678 ft/2,950 mDistance: 10 kmHiking Time: 5-6 hoursHabitat: Montane ForestDetails: Drive to Londorossi Gate and begin the trek through the r...
Day 1
Londorossi Gate → Shira Camp1 Elevation (ft/m): 6
Londorossi Gate to Shira Camp1
Elevation (ft/m): 6,000 ft/1,830 m to 9,678 ft/2,950 mDistance: 10 kmHiking Time: 5-6 hoursHabitat: Montane ForestDetails: Drive to Londorossi Gate and begin the trek through the r...
Day 2
Shira Camp1 → Shira Camp2 Elevation (ft/m): 9
Shira Camp1 to Shira Camp2
Elevation (ft/m): 9,678 ft/2,950 m to 12,600 ft/3,840 mDistance: 12 kmHiking Time: 6-7 hoursHabitat: MoorlandDetails: After breakfast, continue trekking through the moorland zone....
Day 3
Shira Camp 2 to Lava Tower to Barranco Camp
Elevation (ft/m): 12,600 ft/3,840 m to 15,190 ft/4,630 m (Lava Tower) then down to 12,960 ft/3,950 m (Barranco Camp)Distance: 10 kmHiking Time: 6-8 hoursHabitat: Semi-DesertDetails...
Day 4
Barranco Camp to Karanga Camp
Elevation (ft/m): 12,960 ft/3,950 m to 13,123 ft/4,000 mDistance: 5 kmHiking Time: 4-5 hoursHabitat: Alpine DesertDetails: After breakfast, leave Barranco Camp and continue on a st...
Day 5
Karanga Camp → Barafu Camp Elevation (ft/m): 13
Karanga Camp to Barafu Camp
Elevation (ft/m): 13,123 ft/4,000 m to 15,092 ft/4,600 mDistance: 4 kmHiking Time: 4-5 hoursHabitat: Alpine DesertDetails: After breakfast, leave Karanga Camp and continue up to th...
Day 6
Barafu Camp → Mweka Camp Elevation (ft/m): 15
Barafu Camp to Uhuru Peak to Mweka Camp
Elevation (ft/m): 15,092 ft/4,600 m to 19,341 ft/5,895 m (Uhuru Peak) then down to 10,170 ft/3,100 m (Mweka Camp)Distance: 5 km ascent, 12 km descentHiking Time: 7-8 hours ascent,...
Day 7
Mweka Camp → Mweka Gate Elevation (ft/m): 10
Mweka Camp to Mweka Gate
Elevation (ft/m): 10,170 ft/3,100 m to 5,381 ft/1,640 mDistance: 10 kmHiking Time: 3-4 hoursHabitat: Rain ForestDetails: After breakfast, continue the descent to Mweka Gate (5,381...
Live Weather & Short Forecast
Auto-loaded current conditions and upcoming temperature ranges for better packing decisions.
Current conditions
26.9°C
Overcast
2026-06-10
Overcast
17.0°C - 28.0°C
2026-06-11
Overcast
17.0°C - 27.9°C
2026-06-12
Overcast
15.6°C - 28.2°C
2026-06-13
Overcast
14.8°C - 28.1°C
Updated at 06/10/2026, 18:40
Smart Trip Insights
Shown only for hiking and trekking products to avoid overlap with general destination advice.
This module appears only on hiking/trekking products, not on safari or activity-led trips.
Collapsed by default to keep the page focused. Expand only when you need technical details.
Altitude & Temperature Trend
Daily camp and route altitude with temperature trend helps guests quickly understand pacing, gear, and acclimatization needs.
Altitude Trend (m)
5895m / 2950m
Temperature Trend (°C)
4.7°C / -13.5°C
Destination Travel Advice
Practical guidance based on local seasonality and climate to support safer and smoother travel.
Local Temperature Guide
Plains are commonly 21-29C by day, while Ngorongoro mornings feel cold and Kilimanjaro high camps can fall below freezing.
Weather Tips
June to October is drier and more dependable for safari and trekking. April to May is greener, but muddy roads can make transfers longer.
Travel Suggestions
If your priority is scenery and game density, the northern circuit is the most reliable. Add trekking or the coast as a separate second phase to reduce fatigue.
Itinerary
Daily highlights arranged by day, so guests can scan the pace and activities quickly.
Day 1
Londorossi Gate to Shira Camp1
Trek section
Londorossi Gate → Shira Camp1 Elevation (ft/m): 6
Primary spotShira Camp 1Extra spotsLondorossi GateElevation (ft/m): 6,000 ft/1,830 m to 9,678 ft/2,950 mDistance: 10 kmHiking Time: 5-6 hoursHabitat: Montane ForestDetails: Drive to Londorossi Gate and begin the trek through the rainforest to Shira Camp 1.
Day 2
Shira Camp1 to Shira Camp2
Trek section
Shira Camp1 → Shira Camp2 Elevation (ft/m): 9
Primary spotShira Camp 2Extra spotsShira Camp 1Elevation (ft/m): 9,678 ft/2,950 m to 12,600 ft/3,840 mDistance: 12 kmHiking Time: 6-7 hoursHabitat: MoorlandDetails: After breakfast, continue trekking through the moorland zone. The trail gradually ascends, offering stunning views of the surrounding landscape. The terrain is characterized by open grasslands and volcanic rock formations. As you approach Shira Camp 2, you will have panoramic views of the Shira Plateau. Arrive at Shira Camp 2, where you will set up camp, have dinner, and rest for the night. This campsite is located on the plateau, providing a unique and scenic experience.
Day 3
Shira Camp 2 to Lava Tower to Barranco Camp
Trek section
Primary spotBarranco CampExtra spotsShira Camp 2Lava TowerElevation (ft/m): 12,600 ft/3,840 m to 15,190 ft/4,630 m (Lava Tower) then down to 12,960 ft/3,950 m (Barranco Camp)Distance: 10 kmHiking Time: 6-8 hoursHabitat: Semi-DesertDetails: From Shira Camp 2, continue to the east up a ridge, passing the junction towards the peak of Kibo. As you continue, your direction changes to the southeast towards the Lava Tower, also known as the “Shark’s Tooth.” This section of the trail offers stunning views of the surrounding mountains and valleys. Shortly after the tower, you come to the second junction, which brings you up to the Arrow Glacier at an altitude of 16,000 ft/4,877 m. Descend from the junction down to Barranco Camp (12,960 ft/3,950 m). Although you end the day at a lower elevation than when you started, this day is crucial for acclimatization and will help your body prepare for summit day. Set up camp, have dinner, and rest for the night.
Day 4
Barranco Camp to Karanga Camp
Trek section
Primary spotKaranga CampExtra spotsBarranco CampElevation (ft/m): 12,960 ft/3,950 m to 13,123 ft/4,000 mDistance: 5 kmHiking Time: 4-5 hoursHabitat: Alpine DesertDetails: After breakfast, leave Barranco Camp and continue on a steep ridge, passing the Barranco Wall. The climb up the Barranco Wall is a highlight of the trek, requiring some scrambling and the use of ropes in some sections. The views from the top are spectacular. Continue to Karanga Valley campsite (13,123 ft/4,000 m). This is a short day meant for acclimatization. Set up camp, have dinner, and rest for the night.
Day 5
Karanga Camp to Barafu Camp
Trek section
Karanga Camp → Barafu Camp Elevation (ft/m): 13
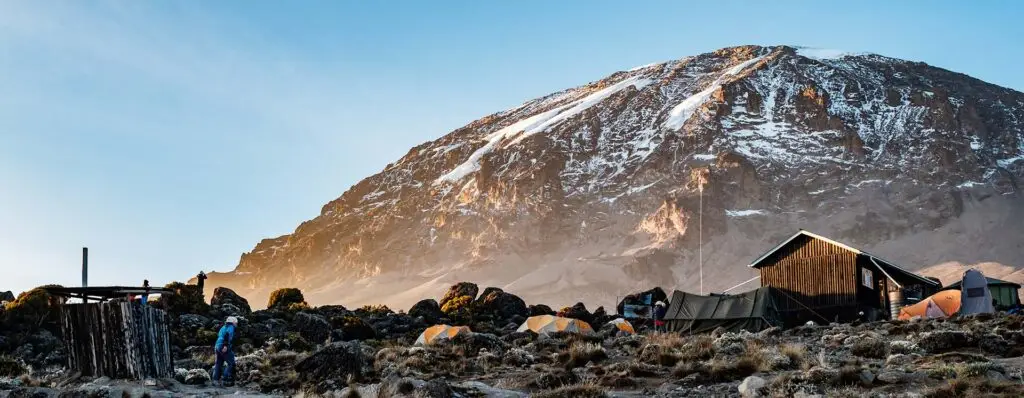
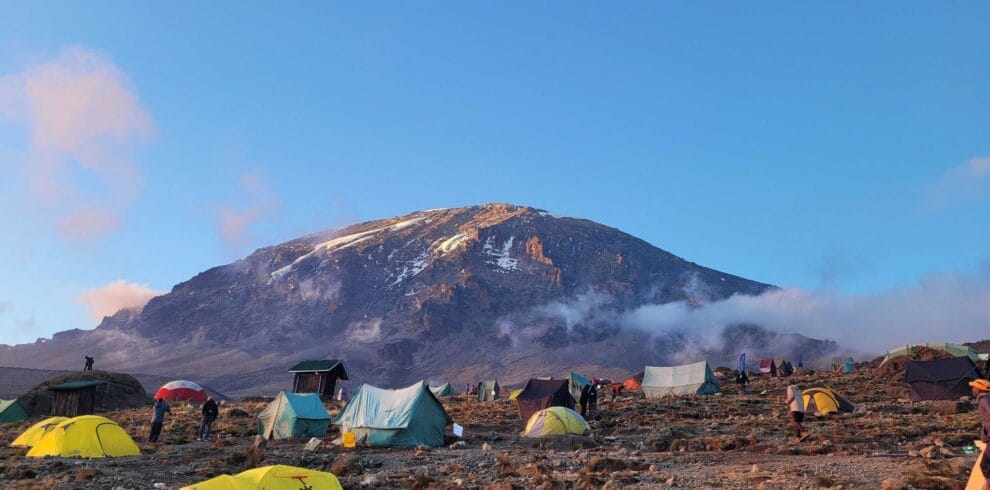
Primary spotBarafu CampExtra spotsKaranga CampElevation (ft/m): 13,123 ft/4,000 m to 15,092 ft/4,600 mDistance: 4 kmHiking Time: 4-5 hoursHabitat: Alpine DesertDetails: After breakfast, leave Karanga Camp and continue up to the Barafu Hut (15,092 ft/4,600 m). The trail passes through a rocky and barren landscape, offering panoramic views of the surrounding mountains. Barafu Camp is located on a ridge with stunning views of Mawenzi and Kibo peaks. Set up camp, have dinner, and prepare for the summit attempt. This campsite is exposed, and the weather can be harsh, so be prepared for cold and windy conditions.
Day 6
Barafu Camp to Uhuru Peak to Mweka Camp
Trek section
Barafu Camp → Mweka Camp Elevation (ft/m): 15
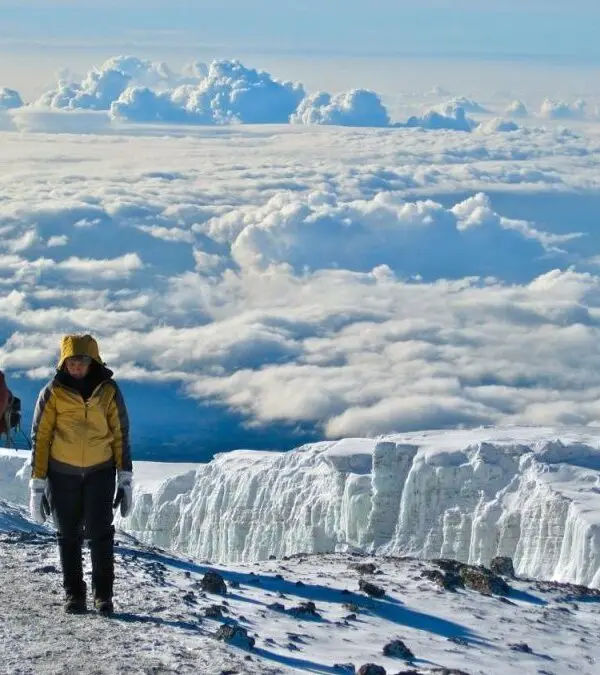
Primary spotUhuru PeakExtra spotsBarafu CampMweka CampElevation (ft/m): 15,092 ft/4,600 m to 19,341 ft/5,895 m (Uhuru Peak) then down to 10,170 ft/3,100 m (Mweka Camp)Distance: 5 km ascent, 12 km descentHiking Time: 7-8 hours ascent, 4-6 hours descentHabitat: ArcticDetails: Wake up around midnight and start the ascent to the summit. The trail is steep and the conditions can be harsh. Head in a northwesterly direction and ascend through heavy scree towards Stella Point on the crater rim. This is the most mentally and physically challenging portion of the trek. At Stella Point (18,600 ft/5,667 m), stop for a short rest and enjoy the sunrise (weather permitting). From Stella Point, continue your 1-hour ascent to Uhuru Peak (19,341 ft/5,895 m), the highest point on Mount Kilimanjaro and the continent of Africa. Descend from the summit to Mweka Camp (10,170 ft/3,100 m), stopping at Barafu Camp for lunch. The descent is long and can be tiring, but the views are still spectacular. Mweka Camp is situated in the upper forest, and mist or rain can be expected in the late afternoon. Have dinner and rest for the night.
Day 7
Mweka Camp to Mweka Gate
Trek section
Mweka Camp → Mweka Gate Elevation (ft/m): 10
Primary spotMweka GateExtra spotsMweka CampElevation (ft/m): 10,170 ft/3,100 m to 5,381 ft/1,640 mDistance: 10 kmHiking Time: 3-4 hoursHabitat: Rain ForestDetails: After breakfast, continue the descent to Mweka Gate (5,381 ft/1,640 m). The trail passes through the rainforest, and it can be muddy and slippery. Arrive at Mweka Gate and receive your summit certificates. A vehicle will be waiting to transfer you back to your hotel in Moshi. Arrive in Moshi in the late afternoon, where you can relax and celebrate your successful trek.
Included
- Transportation: Round-trip transportation from/to Arusha or Kilimanjaro to the trailhead.
- Accommodation: 6 nights of camping on the mountain (tents, sleeping bag and mattresses provided). 2-Night Pre- and Post-Climb Hotel Stays
- Meals: All meals from lunch on Day 1 to lunch on Day 7.
- Park Fees: All national park entrance fees and camping fees.
- Guides and Porters: Professional guides, assistant guides, and porters.
- Equipment: Group camping equipment (tents, dining tent, kitchen tent, and toilet tent).
- Summit Certificates: Official Kilimanjaro summit certificates.
- Emergency Support: Comprehensive emergency support and first aid kit.
Excluded
- Personal Gear: Personal camping gear- trekking poles, headlamp, hiking boots, and warm clothing.
- Flights: International and domestic flights.
- Insurance: Travel and medical insurance.
- Visas: Tanzanian visa fees.
- Tips: Tips for guides, porters, and camp staff.
- Additional Nights: Accommodation in Arusha or Moshi before or after the trek.
- Personal Expenses: Personal expenses such as souvenirs, laundry, and phone calls.
- Early Descent: Any additional costs incurred due to early descent (e.g., extra accommodation).
More ideas after this itinerary
Smart Trip Push
Behavior-aware matching suggests similar trips without cluttering the page. Expand only when needed.

Tanzania
7-Day Lemosho Route Trek with 2-Night Hotel Stay Before and After Climb in Tanzania
Elevation (ft/m): 7,800 ft/2,377 m to 9,500 ft/2,896 m
Elevation (ft/m): 7,800 ft/2,377 m to 9,500 ft/2,896 m
📍 Elevation ft ➜ m : 7 ➜ 800 ft ➜ 377 m
Tanzania
7-Day Machame Route Trek with 2-Night Hotel Stay Before and After Climb in Tanzania
Elevation (ft): 5,400ft to 9,400ft
Elevation (ft): 5,400ft to 9,400ft
📍 Elevation ft : 5 ➜ 400ft
Tanzania
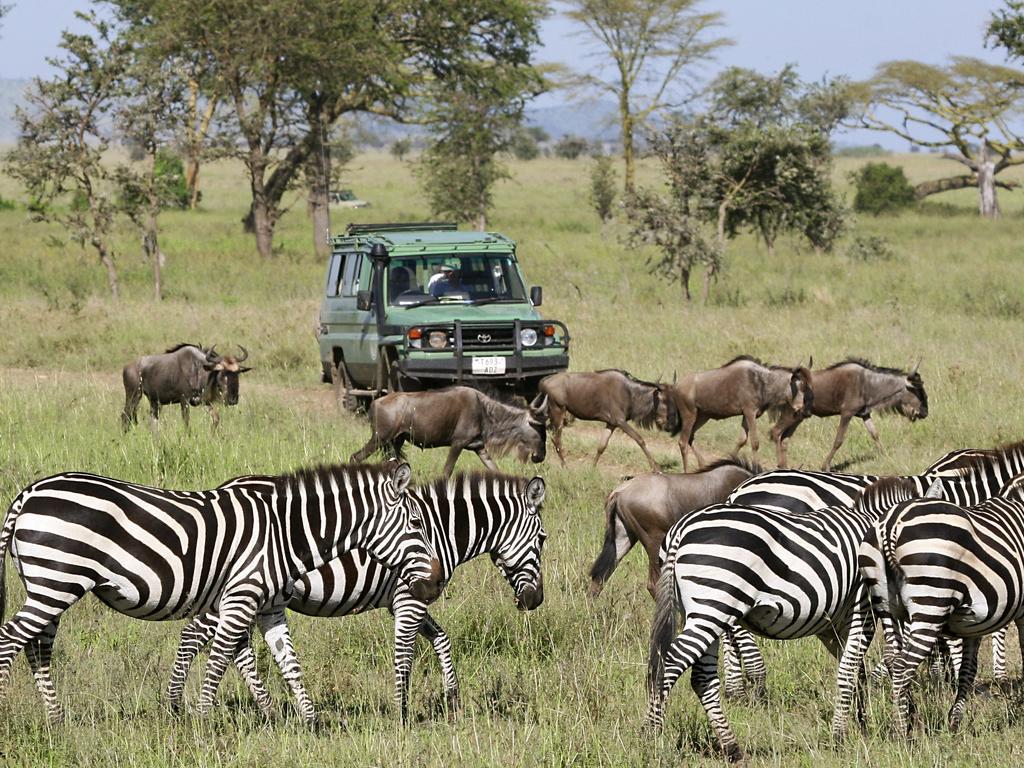
Tanzania 4 Days Lake Manyara, Serengeti And Ngorongoro Crater
Day 1: Arusha-Lake Manyara - Pick up from your hotel/arush...
Day 1: Arusha-Lake Manyara - Pick up from your hotel/arusha Airport in the morning and after a short safari briefing, depart for Lake Manyara National Park, a pristine soda lake in the Rift Valley. The local Baobab trees will illuminate our journey through...
📍 Tanzania
Related Guides
Keep Tanzania feeling like a travel product page by grouping signature spots, route fit, and inspiration cues together instead of presenting it like a pure blog feed.
